
Hello, Today I’ll discuss one of the prerequisite for TestNF tool & how to set it on Dell server.
TestNF is a tool which provides efficient way to test & validate VMware Telco Platform.
Before onboarding/instantiating TestNF, TCA environment needs to meet few of the prerequisites and one of it for Virtual Infrastructure is ESXi version should be 7.0u3+ and SRIOV enabled in both BIOS & vmnic.
In my lab I have Dell PowerEdge R640 servers. I’ll be covering steps to enable SRIOV in BIOS & vmnic for the same.
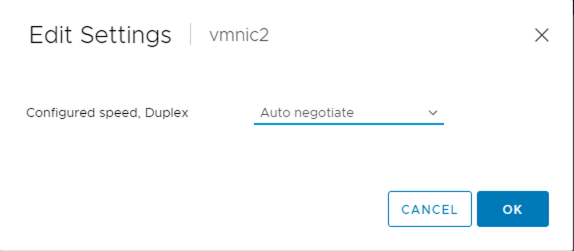
Initially for the host, ‘SRIOV Status’ for a vmnic is seen as ‘Not supported’.

And in Edit settings of that vmnic only ‘Configure speed’ parameter can be set.
To enable SRIOV:
Put the server into Maintenance Mode.
Login to the iDRAC for the server.
Launch Virtual Console.
Restart the server.
After DellEMC blue screen, Press F2 to enter System Setup.

In ‘System Setup’ Main Menu > Select ‘System BIOS’.
In ‘System BIOS Settings’ > Select ‘Integrated Devices’.
Set ‘SR-IOV Global Enable’ parameter to ‘Enabled’.

In ‘System Setup’ Main Menu > Select ‘Device Settings’.
From the list select the NIC Slot for which you want to enable the SRIOV. In my case the NIC is in Slot 3.

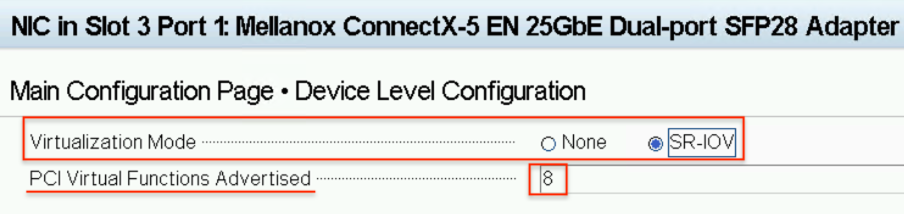
In ‘Main Configuration Page’ for the NIC > Select ‘Device Level Configuration’.
Set ‘Virtualization Mode’ parameter to ‘SR-IOV’.
Save the changes & exit the System setup.
Server will continue & complete the reboot.
After reboot is complete, ‘Exit Maintenance Mode’ for the host.
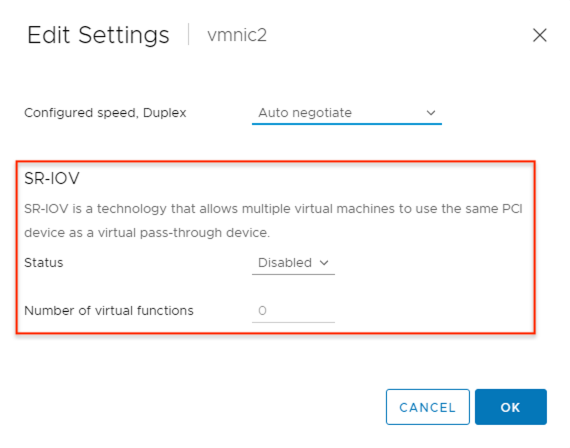
Notice that for the host ‘SRIOV Status’ for a vmnic is seen as ‘Disabled’.

Edit settings for the vmnic will now show the option of SRIOV.
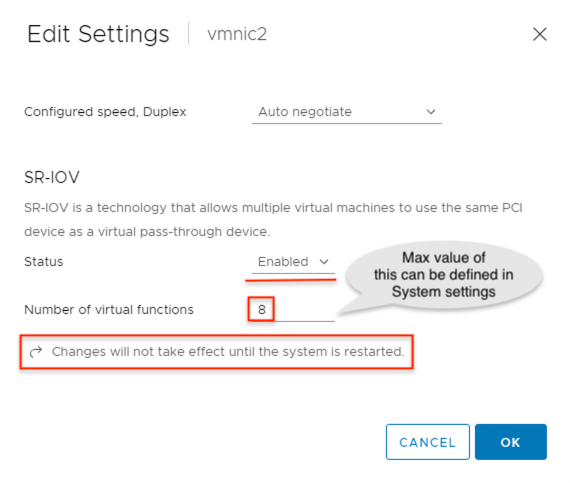
Click on the ‘Status’ dropdown & change to ‘Enabled’.
Set the value for ‘Number of virtual functions’ & Click Ok.
Note that maximum value of this field can be defined in the ‘PCI Virtual Functions Advertised’ field in Device settings.(Refer ‘Device Level Configuration’ screen print above)
SRIOV is enabled for the vmnic.

Repeat these steps on other servers & the vmnics as per your design.
Hoping this will be useful in your lab activities. Cheers 🙂